Author: igor

  • Why Suspension Travel Matters: Picking the Right Amount for Enduro

    Why Suspension Travel Matters: Picking the Right Amount for Enduro

    When building or upgrading your enduro bike, one of the most crucial decisions you’ll make is choosing the right amount of suspension travel. Suspension travel plays a huge role in how your bike handles, how comfortable it is on different terrains, and how much control you’ll have over technical descents or grueling climbs.

    In this article, we’ll dive into why suspension travel matters and guide you through selecting the right amount for your enduro bike. Whether you’re a seasoned rider or just getting into enduro, understanding suspension travel will help you make an informed choice for your riding style and terrain.


    What is Suspension Travel?

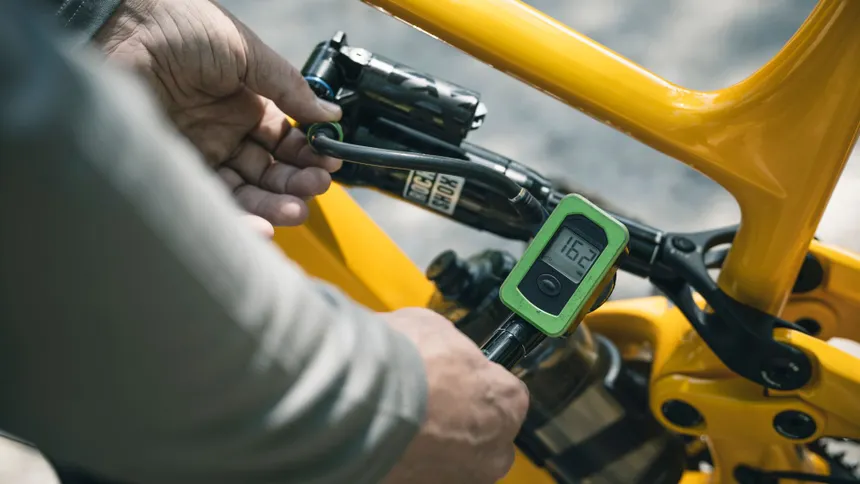
    Suspension travel refers to how much a fork (front suspension) and shock (rear suspension) can compress and extend. This measurement is typically given in millimeters (mm) and represents how much “give” your suspension has to absorb impacts, bumps, and hits.

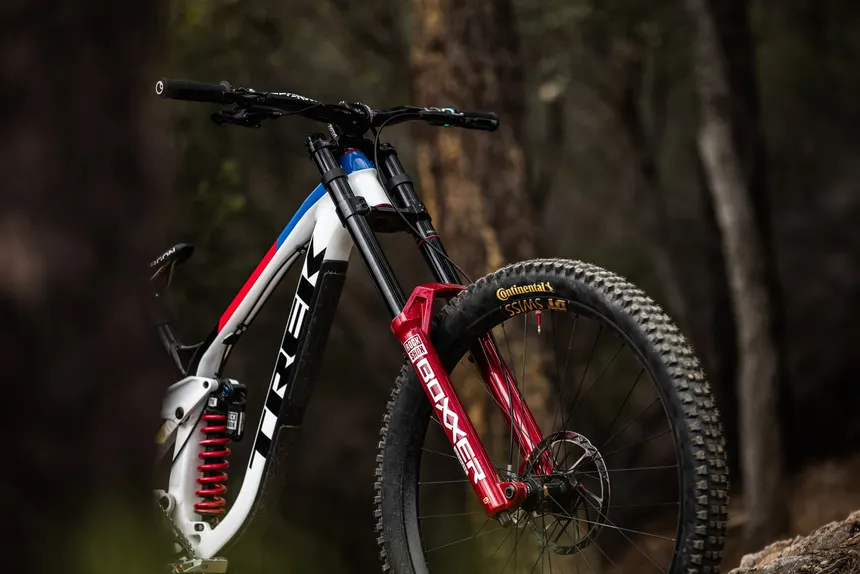
    • Fork Travel: The amount the front fork compresses to absorb impacts. This typically ranges from 150mm to 180mm for enduro bikes.
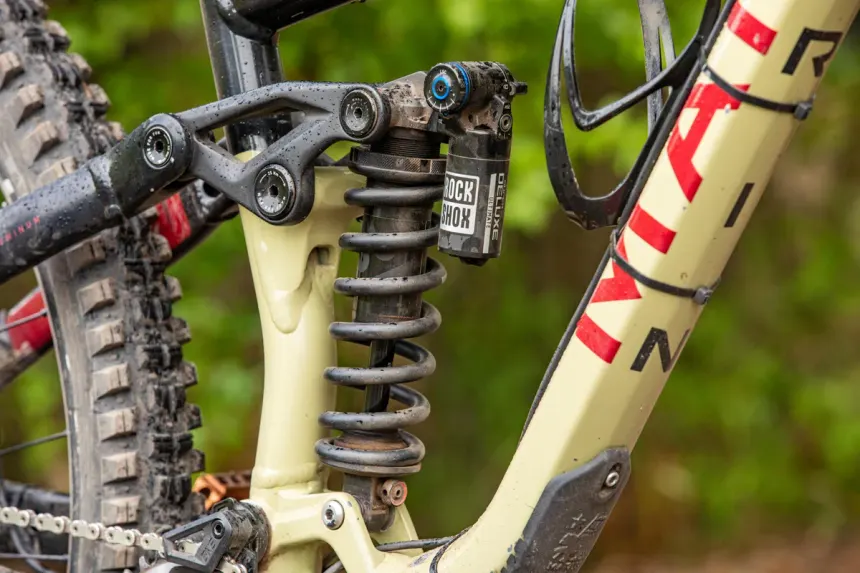
    • Rear Shock Travel: The amount of travel the rear shock has to absorb bumps and impacts. Rear travel usually ranges from 140mm to 170mm for enduro bikes.

    The right amount of suspension travel affects how the bike performs on different types of terrain. Too little travel and you may find yourself bouncing off rocks and drops. Too much, and your bike could feel sluggish and inefficient, especially when climbing.


    How Suspension Travel Affects Handling

    1. Downhill Performance

    Enduro bikes are often put to the test on aggressive descents, rocky trails, and technical features. Suspension travel plays a significant role in how well your bike handles on these challenging downhills.

    • More Travel: Longer suspension travel (160mm – 180mm) provides more plushness, allowing the bike to soak up large impacts and rough terrain. This can help maintain stability and keep you in control when you’re charging downhill. It also offers greater traction and comfort over rooty or jagged trails, allowing your bike to absorb big hits like drops, rocks, and aggressive landings.
    • Less Travel: A shorter suspension (150mm or less) will make the bike feel more agile, but it might not provide the same level of comfort and control over rugged terrain. On steep and technical descents, shorter travel can result in more jarring impacts, making the ride less smooth.

    Tip: If your primary focus is downhill performance and tackling aggressive, rocky descents, opting for longer travel (160mm – 180mm) will give you more control and comfort when things get rough.


    2. Climbing Efficiency

    While enduro bikes are designed for aggressive descents, they also need to perform well on the climbs. Suspension travel can have a significant impact on your climbing efficiency, affecting both comfort and power transfer.

    • More Travel: More suspension travel can lead to more “bob” (unwanted suspension movement) when climbing. This is especially noticeable in the rear shock, which can compress and rebound as you pedal. This “bob” can sap your energy, making climbing feel less efficient, especially on long, technical climbs.
    • Less Travel: A shorter suspension setup generally results in a firmer ride, which reduces pedal bob and allows for better power transfer on climbs. You’ll feel more connected to the bike and the terrain, making it easier to maintain momentum when tackling steep inclines.

    Tip: If you’re looking to maximize climbing efficiency and minimize pedal bob, a suspension setup with shorter travel (150mm or less) is ideal. For more efficient pedaling on mixed terrain, consider going with a balanced setup (e.g., 160mm front and 140mm rear).


    Suspension Travel for Different Riding Styles

    Enduro riding is versatile, and choosing the right suspension travel depends on your specific riding style and the trails you ride most often. Let’s break it down further based on your needs:

    1. Aggressive Riders and Technical Trails

    If you’re someone who prioritizes tackling technical, rocky descents and aggressive riding, longer suspension travel is the way to go. Longer travel gives you the extra cushion and control you need to handle high-speed descents, drops, and rough terrain.

    • Recommended Travel: 160mm – 180mm fork and 150mm – 170mm rear shock.
    • Ideal for: Steep and rocky descents, rough terrain, big drops, and technical features.

    2. All-Around Riders

    If you ride a mix of terrain—some climbs, some descents, and everything in between—an all-around setup with balanced suspension travel will give you the best of both worlds. You’ll have enough travel for descending while maintaining efficient climbing ability.

    • Recommended Travel: 150mm – 160mm fork and 140mm – 150mm rear shock.
    • Ideal for: Mixed terrain with both technical descents and long climbs, all-day rides.

    3. Climbing-Focused Riders

    For riders who prioritize climbing efficiency over aggressive descending, a shorter suspension setup is key. Less travel will make climbing smoother, and you’ll spend less energy dealing with suspension bob. This setup is perfect for technical climbs or more endurance-based rides.

    • Recommended Travel: 140mm – 150mm fork and 130mm – 140mm rear shock.
    • Ideal for: Long climbs, endurance riding, or riders who focus more on ascent than descent.

    Key Considerations When Choosing Suspension Travel

    Before you settle on a travel amount, consider these factors:

    1. Your Riding Terrain

    • If you’re riding mostly technical descents or rocky trails, you’ll need more suspension travel to handle the big hits and maintain control.
    • For longer climbs and mixed terrain, opt for a more balanced travel setup, offering a compromise between descending comfort and climbing efficiency.

    2. Your Riding Style

    • Aggressive riders benefit from longer travel to absorb impacts and maintain stability when riding aggressively.
    • Riders who prioritize efficiency and want to reduce pedaling “bob” should opt for shorter travel, especially in the rear.

    3. Bike Weight and Fit

    • Heavier riders or those carrying more gear may need more suspension travel to handle the extra load and ensure comfort on rough terrain.
    • Lighter riders may prefer less travel for better climbing efficiency and more agility on descents.

    Conclusion: Finding the Right Suspension Travel for You

    Choosing the right amount of suspension travel for your enduro bike is about balancing comfort, control, and efficiency. Longer travel (160mm – 180mm) excels on aggressive descents and rough trails, while shorter travel (140mm – 150mm) provides better climbing efficiency and less bobbing. For most riders, a balanced setup with 160mm front travel and 140mm to 150mm rear travel works best for handling both climbs and descents.

    Ultimately, the best suspension travel for you will depend on your riding style, the trails you ride, and your personal preferences. Experiment with different setups and fine-tune your suspension to get the most out of your enduro bike. Happy riding!

  • Enduro Bike Build 101: Selecting the Right Frame and Suspension for Your Riding Style

    Enduro Bike Build 101: Selecting the Right Frame and Suspension for Your Riding Style

    Building your dream enduro bike can be an exciting and rewarding experience. But with so many options available, choosing the right frame and suspension can feel overwhelming. Your choice will directly affect the bike’s handling, comfort, and performance, making it essential to match these components to your specific riding style.

    In this article, we’ll guide you through the process of selecting the right enduro bike frame and suspension setup to suit your needs, whether you’re a seasoned racer or a weekend warrior. Let’s break down the key factors to consider when choosing the perfect frame and suspension for your enduro bike build.


    1. Choosing the Right Enduro Bike Frame

    The frame is the backbone of your bike, affecting everything from handling to comfort. When selecting a frame for your enduro bike, consider these key elements:

    Material: Aluminum vs. Carbon

    • Aluminum Frames: Aluminum is the go-to material for most enduro bikes, thanks to its strength, affordability, and relatively low weight. Aluminum frames are tough and can handle rough terrain without sacrificing too much durability. They are also more budget-friendly than carbon frames, making them an excellent option for riders looking to build a solid bike without breaking the bank.
    • Carbon Frames: Carbon fiber frames are lighter, stiffer, and offer superior vibration damping compared to aluminum. This means they can provide a more responsive ride and improved comfort on long, rough descents. However, carbon frames come at a premium price, so they’re best suited for riders who prioritize performance and are willing to invest in a higher-end bike.

    Tip: If you’re looking for the best balance between weight, performance, and price, an aluminum frame is a solid choice for most riders. Carbon frames are worth the investment if you want the lightest and most responsive setup for competitive racing or technical riding.

    Frame Geometry: Steep vs. Slack

    Enduro bikes are designed to handle a mix of climbing and descending, so frame geometry plays a key role in how your bike handles. Key aspects to consider include:

    • Head Angle: A slacker head angle (around 64-66°) gives the bike more stability on steep descents and technical terrain. This is ideal for aggressive riders who prioritize downhill performance. However, slacker angles may make the bike feel less agile on tight corners or when climbing.
    • Seat Angle: A steeper seat angle (around 75-78°) improves pedaling efficiency and helps with comfort during climbs. A more upright position ensures better power transfer and can reduce fatigue on long rides.
    • Reach and Stack: These measurements determine your riding position. A longer reach makes for a more stretched-out, aggressive position, perfect for high-speed descents. A higher stack provides a more upright and comfortable position for climbing or all-day rides.

    Tip: For most enduro riders, a balanced geometry with a moderate head angle (around 65-66°) works well for both climbing and descending. If you plan on doing more aggressive descending, opt for a slacker angle.


    2. Selecting the Right Suspension: Fork and Shock

    Suspension is where your bike will really shine when it comes to comfort and control. Getting the right suspension setup ensures that your bike performs optimally whether you’re on a technical downhill run or grinding up a steep climb.

    Suspension Travel: Fork and Rear Shock

    Enduro bikes typically feature suspension travel between 150mm and 180mm, depending on your riding style.

    • Fork Travel (150mm – 180mm): The fork is critical for handling rough terrain and absorbing impacts. A longer travel fork (160mm – 180mm) will provide better control and comfort on steep, rocky descents. For lighter or more technical riders, a shorter travel fork (150mm) may provide better handling and efficiency on less aggressive trails.
    • Rear Shock Travel (140mm – 170mm): The rear shock should complement the fork travel to maintain balanced handling. A longer travel rear shock offers more comfort and control on rougher descents but may feel sluggish on climbs. Shorter travel shocks (around 140mm) keep the rear end firmer for better efficiency on climbs while still absorbing impacts on moderate descents.

    Tip: For an all-around enduro bike, a balanced travel setup (e.g., 160mm fork, 150mm rear shock) is a great starting point. If you ride mostly aggressive, downhill-focused terrain, go for longer travel. For more climbing-focused rides, shorter travel might be a better option.

    Fork and Shock Type: Air vs. Coil

    • Air Suspension: Air forks and shocks are lighter and adjustable, making them great for enduro bikes. You can fine-tune the air pressure to match your weight and riding style, providing a responsive and efficient ride. Air suspension is more common in modern enduro bikes and works well for most riders.
    • Coil Suspension: Coil forks and shocks tend to offer more consistent performance, especially for rough terrain. They excel in absorbing big hits and provide a more plush ride, but they are heavier than air suspension. Coil setups are typically used by riders who prioritize descending and want more predictability in their suspension’s behavior.

    Tip: Air suspension is usually the go-to choice for enduro bikes due to its adjustability and lighter weight. Coil suspension is ideal for riders looking for more plushness and control on the roughest terrain but comes with a heavier weight.

    Suspension Tuning and Adjustments

    Once you’ve selected your fork and shock, fine-tuning is essential. You’ll need to adjust things like:

    • Sag: Set the correct sag (around 25-30% of travel) to ensure your suspension works effectively. Too much sag will make the bike feel sluggish, while too little can lead to a harsh ride.
    • Compression and Rebound Damping: Adjust the compression to control how the suspension handles small bumps and big hits. Rebound controls how quickly the suspension returns after compressing. For climbing, you’ll want more compression and faster rebound, while for descending, you’ll want the opposite to absorb rough terrain more effectively.

    Tip: Suspension setup is very personal. Make small adjustments and test them on the trail to find the perfect balance of comfort and control for your riding style.


    3. Other Considerations: Weight, Durability, and Budget

    When choosing both the frame and suspension, it’s important to balance weight, durability, and your budget.

    • Weight: A lighter frame and suspension will improve efficiency on climbs and make the bike feel more agile. However, lighter materials can sometimes be less durable, especially for aggressive riders. Finding a balance is key, so consider your riding style before prioritizing weight savings.
    • Durability: Enduro riding can be demanding on your bike, so durability is crucial. Choose a frame made from high-quality materials like 7000-series aluminum or carbon fiber, and opt for suspension components known for their toughness and performance.
    • Budget: Building an enduro bike can get expensive, especially with high-end carbon frames and premium suspension. Start by prioritizing the most important components—frame and suspension—then gradually upgrade other parts like wheels, tires, and drivetrain as your budget allows.

    Tip: Don’t skimp on the frame and suspension—these components will have the greatest impact on your bike’s performance. Other parts can be upgraded later as needed.


    Conclusion: Building Your Perfect Enduro Bike

  • How to Fine-Tune Your Enduro Bike’s Suspension for Downhill and Climbing

    How to Fine-Tune Your Enduro Bike’s Suspension for Downhill and Climbing

    Enduro biking demands a lot from both the rider and the bike, requiring a suspension system that can handle both technical climbs and aggressive descents. The right suspension setup ensures comfort, control, and efficiency on the trail, but achieving this balance can take a little fine-tuning. Whether you’re tackling steep downhills or grueling climbs, adjusting your suspension to suit these two extremes can drastically improve your ride.

    In this article, we’ll walk you through how to fine-tune your enduro bike’s suspension for both downhill and climbing, ensuring that you get the best of both worlds.


    1. Setting the Right Sag: The Foundation of Suspension Setup

    Sag is the amount your suspension compresses under your body weight when you’re on the bike. Setting the correct sag is one of the most important steps in fine-tuning your suspension, as it ensures proper shock absorption and responsiveness.

    • Downhill Setup: For downhill, you generally want to set the sag at around 25-30% of the total suspension travel. This allows the suspension to absorb large impacts and rough terrain without bottoming out. For example, if you have a fork with 160mm of travel, aim for around 40mm-48mm of sag. This ensures stability and control on fast, technical descents.
    • Climbing Setup: On the other hand, for climbing, you’ll want a firmer suspension to reduce energy loss. A sag around 20-25% is typically ideal. Less sag means less “bob,” or unwanted suspension movement, which allows you to transfer power more efficiently during climbs.

    Tip: Use a suspension pump with a gauge to adjust the air pressure in your fork and shock to achieve the desired sag. Make sure you check your sag on a flat surface to ensure it’s consistent.


    2. Compression Damping: Adjusting for Comfort and Control

    Compression damping controls how quickly your suspension compresses when hitting obstacles or applying pressure. There are two main types: low-speed compression (affecting slower, larger movements) and high-speed compression (affecting faster, smaller impacts).

    • Downhill Setup: For downhill riding, you want a slightly softer compression setting. This allows your suspension to absorb bumps and large hits smoothly, improving comfort and control. Set the low-speed compression damping to a softer setting, which helps the suspension stay active on rough terrain and ensures it soaks up impacts.
    • Climbing Setup: For climbing, you’ll want your suspension to resist unwanted movement, so you need a firmer compression setting. Tightening the low-speed compression will reduce “squat” (the suspension’s tendency to compress under power), allowing you to keep your body position more upright and efficient during climbs. You can also add a bit more high-speed compression to prevent excessive movement when you’re hitting small obstacles like roots or rocks while climbing.

    Tip: When adjusting your compression, do so in small increments. Too much compression can make the ride feel harsh, while too little can result in a “bouncy” feeling.


    3. Rebound Damping: Control Suspension Return Speed

    Rebound damping controls how quickly your suspension returns to its original position after compressing. Proper rebound control is essential for both maintaining traction and avoiding “packing down,” where the suspension doesn’t fully extend between hits, leading to a less controlled ride.

    • Downhill Setup: When descending, you’ll want a slower rebound to keep the bike’s suspension under control. If the rebound is too fast, the suspension will extend too quickly after compressing, which can make the bike feel unstable and unsteady. A slower rebound ensures that the suspension stays engaged and maintains traction as you navigate rough terrain and steep descents.
    • Climbing Setup: For climbing, a slightly faster rebound setting can improve efficiency. A faster rebound helps keep the bike’s rear end from feeling sluggish and allows you to maintain a more dynamic and responsive ride. However, be careful not to make the rebound too fast, as it can make the bike feel twitchy and less stable.

    Tip: Rebound adjustments should also be done gradually. Always test the feel of the bike after each change, as small adjustments can have a noticeable impact on ride quality.


    4. Air Volume and Spring Rate: Fine-Tuning for the Terrain

    Your bike’s air volume (or spring rate, for coil suspension) significantly impacts how the suspension performs over the course of a ride. Air volume determines the progression of the suspension’s stroke—how it ramps up toward the end of the travel.

    • Downhill Setup: For downhill riding, you may want higher air volume or less progressive spring rates. A more progressive suspension setup allows the suspension to soak up big impacts without bottoming out, which is crucial for aggressive descents. This setup helps the bike stay composed and stable during high-speed descents or when hitting large drops and jumps.
    • Climbing Setup: For climbing, reducing the air volume or opting for a less progressive spring can help reduce excessive suspension movement, making the bike feel more efficient. This setup reduces suspension “sag” during pedaling efforts and allows more of your energy to go toward forward motion rather than compressing the shock.

    Tip: You can adjust air volume using volume spacers, which increase progression. For coil shocks, changing the spring rate can help dial in the correct feel.


    5. Fine-Tuning Based on Riding Style and Terrain

    Every rider has a unique style, and the trails you ride can vary greatly, from smooth paths to challenging rock gardens and loose, technical descents. Fine-tuning your suspension should be an ongoing process, and small adjustments can have a significant effect on your ride quality.

    • For Technical Trails: If you’re riding highly technical trails with lots of obstacles and drops, aim for a slightly softer suspension to improve traction and smoothness. This allows the suspension to stay active and provide better feedback when navigating tricky sections.
    • For Flowing, Fast Trails: On trails where speed and flow are key, you might want a slightly firmer suspension to ensure efficient pedaling and less “sag” on jumps and fast corners.

    Tip: Keep a log of your suspension adjustments, so you can refer back to your ideal settings when conditions change or if you need to make adjustments for specific terrain.


    Conclusion: Achieving the Perfect Suspension Setup

    Fine-tuning your enduro bike’s suspension is all about balancing comfort and control. While it can take some time to get everything dialed in perfectly, the effort is worth it for improved performance, both uphill and downhill. By adjusting your sag, compression, rebound, air volume, and fine-tuning based on your riding style, you can significantly enhance your experience on the trail.

    Remember, there’s no one-size-fits-all suspension setup. It’s essential to test your adjustments on the trail, making incremental changes to find the perfect balance. With the right suspension setup, you’ll be able to tackle both the climbs and the descents with confidence, comfort, and control.

    Happy riding!

  • How Enduro Bike Handlebars Influence Control and Comfort

    How Enduro Bike Handlebars Influence Control and Comfort

    When it comes to enduro biking, your handlebars are one of the most critical points of contact between you and the bike. While they may seem like a simple component, the shape, width, rise, and material of your handlebars can significantly affect both your control and comfort on the trail. Whether you’re climbing steep inclines, navigating technical descents, or bombing down rocky paths, the right handlebars can make all the difference. In this article, we’ll explore how various aspects of enduro bike handlebars influence your performance and comfort.

    1. Handlebar Width: Balance Between Stability and Agility

    The width of your handlebars has a direct impact on how your bike handles, particularly in terms of stability and maneuverability.

    • Wider Handlebars (780mm – 820mm or more): Wider bars provide more leverage, which gives you greater control and stability when descending and navigating rough, technical terrain. The added width helps you steer more effectively, especially when riding through fast, rocky sections or when you need to maintain a solid, stable grip on the bike. For aggressive descents and demanding trails, wider handlebars help absorb impacts and improve control.
    • Narrower Handlebars (720mm – 760mm): Narrower bars are often favored by riders who prioritize agility and quicker handling, especially on tighter, twistier trails. They allow for faster steering and make it easier to navigate narrow singletrack or tight switchbacks. However, they can feel less stable when descending at high speeds or on loose terrain.

    Tip: Wider handlebars are usually recommended for enduro bikes, as they provide better control on technical descents. However, the width should be adjusted based on your riding style and body size. Taller riders or those with wider shoulders may benefit from wider bars, while shorter riders might prefer something more narrow.

    2. Handlebar Rise: Comfort and Riding Position

    The rise of your handlebars refers to how much they are raised from the center of the bike’s stem. The rise affects your body position on the bike, influencing your comfort, control, and overall riding experience.

    • Higher Rise Bars: A higher rise (30mm or more) can help you achieve a more upright riding position, which can reduce strain on your back and arms. This is particularly helpful for long climbs or when you need to stay comfortable while riding for extended periods. Higher rise bars also shift your weight slightly more rearward, helping with traction and control on steep descents.
    • Lower Rise Bars: A lower rise (0mm – 20mm) brings your body lower to the bike, which can improve stability and control on descents. Lower bars often offer a more aggressive, race-oriented posture, making them ideal for fast, technical riding where you need to keep your center of gravity low for maximum control.

    Tip: Choose a bar rise that complements your riding style. If you ride more technical trails and prefer a more aggressive, low-riding stance, a lower rise may be better. For comfort and climbing efficiency, higher-rise handlebars are a great choice.

    3. Handlebar Sweep: The Effect on Wrist and Arm Fatigue

    Handlebar sweep refers to the angle at which the handlebars curve back toward you, usually measured in degrees. The sweep of the bar affects how your arms and wrists are positioned while riding.

    • More Sweep (up to 9-12 degrees): Handlebars with more sweep allow your hands and wrists to adopt a more natural position, which can reduce strain and fatigue, especially on long rides. This ergonomic angle can be particularly helpful for riders who experience wrist or elbow discomfort on technical trails. More sweep also provides a relaxed feel, making it easier to hold on during climbs or descents.
    • Less Sweep (0-6 degrees): A bar with less sweep offers a more aggressive riding position and might feel more responsive when navigating tight corners or making quick directional changes. However, this can place more stress on your wrists and arms, especially on long rides or technical descents.

    Tip: If you’re prone to wrist or arm fatigue, opting for handlebars with more sweep can improve comfort. However, if agility and responsiveness are your top priorities, you may want to stick with a less pronounced sweep.

    4. Material and Flex: Durability and Vibration Dampening

    The material of your handlebars can greatly impact how your bike feels on rough terrain, particularly in terms of shock absorption and overall durability.

    • Aluminum Bars: Most enduro handlebars are made from aluminum because it strikes a good balance between strength, weight, and affordability. Aluminum bars are durable and provide excellent performance without significantly increasing weight. However, they can transmit more vibrations from rough terrain to your hands, leading to more fatigue on long rides.
    • Carbon Bars: Carbon fiber handlebars are lighter and better at dampening vibrations compared to aluminum. This means they provide a smoother ride, especially on rough terrain. Carbon bars also absorb shocks better, reducing arm and hand fatigue over long rides. However, they tend to be more expensive and may not be as durable as aluminum in extreme conditions.

    Tip: If you’re looking for a balance of weight, durability, and vibration dampening, aluminum handlebars are a solid choice. For a smoother ride and less fatigue, carbon fiber handlebars can be a great upgrade, though they come with a higher price tag.

    5. Handlebar Diameter: Grip and Control

    Handlebar diameter affects both the feel of the handlebars and how much control you have while riding. The diameter at the clamping area (the area where the handlebars attach to the stem) typically comes in two sizes: 31.8mm and 35mm.

    • 31.8mm Bars: The standard diameter for most handlebars, these offer a good mix of strength, comfort, and control. They are lighter and provide a more forgiving ride compared to larger diameter bars.
    • 35mm Bars: Larger diameter bars offer increased strength and stiffness, making them ideal for aggressive riding and rough terrain. They can provide better control during technical descents, but the increased stiffness may translate to less comfort, especially over long rides.

    Tip: If you prioritize strength and precision for aggressive riding, 35mm bars might be the better option. However, if comfort is key, particularly for longer rides, the 31.8mm diameter might provide a better balance.


    Conclusion: Finding the Right Handlebars for Your Ride

    Your handlebars are more than just a place to hold onto—they influence your control, comfort, and overall riding experience. By carefully considering factors like width, rise, sweep, material, and diameter, you can tailor your handlebars to suit your riding style and preferences.

    For enduro riders, handlebars that provide a balance of control and comfort are crucial, especially when tackling technical terrain and long, rough descents. Whether you’re looking to enhance your stability, reduce wrist strain, or increase comfort during long climbs, the right handlebars can make all the difference.

    Experiment with different configurations, and don’t be afraid to test various setups until you find the one that feels just right for your riding style and terrain. A small upgrade in handlebar design can drastically improve your performance and enjoyment on the trail.

  • Enduro Bike Geometry: What to Look for to Improve Handling

    Enduro Bike Geometry: What to Look for to Improve Handling

    When it comes to enduro biking, the geometry of your bike plays a crucial role in how it handles the rough and varied terrain that enduro riders often face. Whether you’re tackling steep climbs or bombarding down technical descents, getting your bike’s geometry right can make a huge difference in your performance and comfort. But with so many options available, how do you know what to look for? In this article, we’ll break down key elements of enduro bike geometry and how to choose the right setup for improved handling.

    1. Head Angle: Stability vs. Agility

    The head angle, or steering angle, is one of the most important factors influencing how your bike handles, especially when descending.

    • Slacker Angles (Head Angle > 65°): Modern enduro bikes often feature slacker head angles, around 65° to 66°, to improve stability on steep descents. A slack head angle lowers the bike’s front end and increases the reach of the handlebars, making it less twitchy and more predictable on rough terrain. This geometry provides better control when riding through technical sections and improves high-speed stability.
    • Steeper Angles (Head Angle < 65°): A steeper head angle (closer to 69°) offers quicker steering and greater agility on flatter trails, making it easier to change direction. However, this comes at the cost of stability when descending, especially at high speeds or in rocky sections.

    Tip: If you’re mostly riding steep, technical trails, a slacker head angle is preferable for improved stability and control.

    2. Reach: Comfort and Control

    Reach refers to the horizontal distance from the bottom bracket to the head tube. It plays a vital role in bike fit and handling.

    • Longer Reach: A longer reach creates a more stretched-out riding position, which is ideal for stability and control on downhill sections. This geometry prevents the rider from feeling cramped and allows for better weight distribution, especially when navigating steep descents.
    • Shorter Reach: A shorter reach offers a more upright and agile riding position, which can help when climbing or making quick directional changes. However, it can compromise your stability on descents.

    Tip: When looking for the ideal reach, consider your body size and riding style. A longer reach is often better for taller riders or those focused on descending, while shorter reach bikes may be more comfortable for shorter riders or those who prioritize climbing.

    3. Seat Tube Angle: Efficient Power Transfer

    The seat tube angle influences how efficiently your bike transfers power during pedaling, particularly on steep climbs.

    • Steeper Angles: A steeper seat tube angle (75° or greater) keeps your hips over the pedals, allowing for better pedaling efficiency and more power transfer when tackling climbs. It also helps keep your weight centered and prevents you from feeling too stretched out, especially on steep inclines.
    • Flatter Angles: A flatter seat tube angle can be beneficial for riders who prefer a more relaxed ride, but it may reduce pedaling efficiency and comfort on climbs.

    Tip: For enduro riders, a steeper seat tube angle helps ensure your bike performs well during both technical descents and sustained climbs.

    4. Bottom Bracket Height: Center of Gravity

    The bottom bracket height impacts your bike’s center of gravity and, consequently, its handling.

    • Lower Bottom Bracket: A lower bottom bracket lowers the center of gravity, making your bike feel more stable when cornering and descending. However, this can also increase the risk of pedal strikes on rocky or technical terrain.
    • Higher Bottom Bracket: A higher bottom bracket raises the center of gravity, which can improve ground clearance and reduce pedal strikes. However, this may make the bike feel a bit less stable in corners or on steeper terrain.

    Tip: A moderate bottom bracket height works best for most enduro riders, providing a good balance between stability and ground clearance.

    5. Chainstay Length: Balance Between Agility and Traction

    The chainstay length affects how the bike handles, particularly in tight corners and when applying power to the rear wheel.

    • Shorter Chainstays: A shorter chainstay offers quicker handling and is ideal for tight switchbacks or technical maneuvers. However, it can sometimes reduce rear-wheel traction, especially on steep descents.
    • Longer Chainstays: Longer chainstays provide better stability and traction, especially on steep climbs and descents. While they can make the bike feel less nimble, they offer more control at high speeds.

    Tip: Most modern enduro bikes feature chainstay lengths that balance stability with agility, providing versatility across different terrain types.

    6. Wheel Size: The Right Fit for Terrain

    Enduro bikes come with different wheel sizes, and the geometry plays a significant role in how each wheel size behaves.

    • 27.5-inch Wheels: Smaller wheels provide more agility and are better for quick turns and technical sections. They can be easier to flick around, making them ideal for tight, twisty trails.
    • 29-inch Wheels: Larger wheels provide better rolling efficiency, greater momentum, and improved stability on rough terrain. They are excellent for fast descents and provide better grip in loose conditions.

    Tip: Choose a wheel size based on your preferred terrain. 29-inch wheels excel on steep, fast descents, while 27.5-inch wheels are better for tight and technical trails.

    7. Suspension Travel: Tailoring to Your Riding Style

    The amount of suspension travel plays a huge role in handling and overall comfort.

    • Shorter Travel (150mm or less): Lighter suspension travel is ideal for riders who prefer a more responsive and agile ride, particularly in cross-country or trail-focused enduro races. It offers better pedaling efficiency but may sacrifice some downhill comfort.
    • Longer Travel (160mm or more): More suspension travel is better suited for technical descents and rough trails. It provides better control and absorbs impacts from rough terrain but can make the bike feel less responsive on flatter sections.

    Tip: Consider the type of terrain you ride most often when selecting suspension travel. More travel will help you tackle challenging descents, while less travel offers a more efficient ride for less technical terrain.


    Conclusion: Finding the Right Balance

    Enduro bike geometry isn’t a one-size-fits-all approach. It’s essential to find the balance that works best for your riding style, terrain, and body size. When choosing a bike, consider factors like head angle, reach, seat tube angle, bottom bracket height, and wheel size to find the perfect setup for your needs. Don’t forget that small adjustments in your bike’s geometry can lead to huge improvements in your handling, so take the time to test different configurations before committing.

    Happy riding, and enjoy the trail!

  • Best MTB Enduro Bikes Under $3000 in 2025

    Best MTB Enduro Bikes Under $3000 in 2025

    If you’re an enduro enthusiast looking to push your limits on the trails without breaking the bank, you’re in luck. With a budget of $3,000, there’s a solid selection of high-performance bikes that offer a perfect balance between climbing efficiency and downhill prowess. Let’s dive into the best MTB enduro bikes under $3,000 for 2025!

    Specialized Stumpjumper Alloy

    • Price: Around $2,800
    • Suspension: 150mm front, 140mm rear
    • Wheels: 29”
    • Drivetrain: SRAM SX Eagle 12-speed

    The Specialized Stumpjumper is a legend in the trail and enduro scene. Its balanced geometry and plush suspension make it a beast on descents while remaining nimble on the climbs. The alloy frame keeps costs down without sacrificing durability, and the SRAM SX Eagle drivetrain ensures smooth shifting on technical terrain.

    Canyon Spectral 5

    • Price: $2,899
    • Suspension: 150mm front, 140mm rear
    • Wheels: 29”
    • Drivetrain: Shimano Deore 1×12

    The Canyon Spectral 5 is a true enduro machine designed for big mountain rides. Its progressive geometry, combined with a solid suspension setup, makes it ideal for riders who want to conquer technical descents without compromising climbing ability. The Shimano Deore drivetrain offers reliable performance on demanding trails.

    Marin Rift Zone 2

    • Price: $2,699
    • Suspension: 140mm front and rear
    • Wheels: 29”
    • Drivetrain: Shimano SLX 12-speed

    Marin’s Rift Zone 2 offers a modern, aggressive geometry that’s perfect for tackling both climbs and descents. With 140mm of travel, this bike provides a smooth ride over rough terrain while still being responsive. It’s an ideal choice for riders who want a fun, playful bike with solid enduro credentials.

    ICAN P1

    • Price: $2,800
    • Suspension: 150mm RockShox fork, 140mm rear shock
    • Wheels: 27.5” or 29”
    • Drivetrain: SRAM NX Eagle 12-speed

    The ICAN P1 is a standout for those looking for a carbon frame under $3,000. It combines top-tier suspension with quality components, ensuring both strength and performance. Whether you’re racing enduro or hitting weekend trails, this bike delivers a lightweight yet robust ride.

    Co-op Cycles DRT 3.3

    • Price: $2,999
    • Suspension: 140mm RockShox Pike fork, 130mm rear shock
    • Wheels: 29”
    • Drivetrain: SRAM GX Eagle 12-speed

    REI’s Co-op Cycles DRT 3.3 punches above its weight with high-end components and a full-suspension setup. With a RockShox Pike fork and SRAM GX Eagle drivetrain, this bike is built for aggressive enduro riding, tackling both steep descents and technical climbs with ease.

    What to Look for in an Enduro Bike Under $3,000

    • Suspension: Aim for 140–150mm of travel for the versatility needed in enduro riding.
    • Frame Material: Aluminum is most common at this price point, but a few carbon options (like the ICAN P1) are available.
    • Components: Prioritize drivetrains from SRAM NX or Shimano SLX and hydraulic disc brakes for reliable stopping power.
    • Wheel Size: 29” wheels offer stability and better rollover on rough trails, while 27.5” provide a more playful, nimble feel.

    Conclusion

    Scoring a capable enduro bike under $3,000 in 2025 is not only possible — it’s exciting. These models prove that you don’t need to spend a fortune to ride hard and push limits. Whether you’re eyeing the classic Stumpjumper, the value-packed Marin Rift Zone, or the sleek ICAN P1, there’s something here for every enduro rider.

    Which of these bikes are you most excited to test out on the trails? Let us know in the comments, and happy shredding! 🚵‍♀️

  • Best MTB Enduro Bikes Under $2000 in 2025

    Best MTB Enduro Bikes Under $2000 in 2025

    Finding a solid enduro mountain bike under $2,000 in 2025 might seem like searching for a unicorn, but fear not — there are some hidden gems that balance performance, durability, and affordability. Whether you’re a weekend warrior tackling gnarly descents or an aspiring racer on a budget, these bikes deliver where it counts. Let’s break down the top contenders!


    🚵‍♂️ 1. Polygon Siskiu D7

    • Price: Around $1,999
    • Suspension: 120mm RockShox front and rear
    • Wheels: 27.5” or 29”, size-dependent
    • Drivetrain: Shimano Deore 1×12

    The Polygon Siskiu D7 is a versatile trail slayer, offering impressive suspension performance and modern geometry. With both wheel size options, it caters to riders of all heights and riding styles. The RockShox suspension keeps things smooth on technical trails, while the dropper post is a welcome bonus at this price point.


    🌲 2. Marin Rift Zone 1

    • Price: Around $1,899
    • Suspension: 130mm travel front and rear
    • Wheels: 29”
    • Drivetrain: Shimano Deore 1×11

    Marin’s Rift Zone 1 strikes a perfect balance between climbing efficiency and downhill confidence. Its 130mm travel paired with a modern, slack geometry makes it a fantastic all-rounder. Ideal for those looking to tackle both flowing singletracks and chunkier enduro lines without sacrificing pedaling efficiency.


    ⛰️ 3. Co-op Cycles DRT 2.1

    • Price: $1,599
    • Suspension: 140mm RockShox Judy fork
    • Wheels: 27.5”
    • Drivetrain: SRAM SX Eagle 12-speed

    REI’s in-house brand delivers incredible value with the DRT 2.1. While technically a hardtail, its long travel fork and aggressive geometry make it a strong option for budget-conscious riders looking for enduro-capable handling. Plus, a dropper post and hydraulic disc brakes come stock — rare at this price.


    🔥 4. Diamondback Release 1

    • Price: Around $1,999
    • Suspension: 150mm SR Suntour Aion fork, 130mm X-Fusion rear shock
    • Wheels: 27.5”
    • Drivetrain: Shimano Deore 1×10

    The Diamondback Release 1 is designed for aggressive trail and enduro riding. Its longer-travel fork combined with a plush rear shock gives it the ability to devour rough descents, while still climbing efficiently. It’s a great option if you want big-hit capability without breaking the bank.


    🏔️ 5. GT Force Comp Alloy

    • Price: Just under $2,000
    • Suspension: 150mm front and rear
    • Wheels: 29”
    • Drivetrain: SRAM NX Eagle 12-speed

    For those seeking full-suspension confidence on steep, technical trails, the GT Force Comp Alloy brings enduro performance at an entry-level price. The 29” wheels help smooth out rock gardens, and the 150mm of travel means you can push hard on descents while still climbing steadily.


    Key Considerations When Choosing an Enduro Bike Under $2,000:

    • Suspension: Look for at least 120mm of travel, but 140–150mm is ideal for enduro riding.
    • Frame Material: Aluminum frames dominate this price range — strong, durable, and relatively lightweight.
    • Components: Prioritize reliable drivetrains (Shimano Deore or SRAM SX/NX) and hydraulic disc brakes.
    • Wheel Size: 27.5” for a playful, nimble feel; 29” for rollover confidence and stability.

    Final Thoughts

    While $2,000 might be the lower end for enduro bikes, these models prove you don’t need to empty your wallet to shred the trails. Each bike offers a balance of solid suspension, modern geometry, and dependable components — perfect for tackling enduro stages or weekend adventures.

    Which of these budget enduro beasts caught your eye? Let us know in the comments below — and happy shredding! 🚵‍♀️

  • Air vs. Coil Shocks: Which Suspension Type Suits Your Enduro Style?

    Air vs. Coil Shocks: Which Suspension Type Suits Your Enduro Style?

    When it comes to enduro riding, suspension setup plays a crucial role in how your bike handles rough terrain, descents, and technical climbs. One of the most hotly debated topics in the suspension world is the choice between air shocks and coil shocks. Each has its pros and cons, and the right option for you depends on your riding style, terrain preferences, and personal feel. Let’s break down the differences to help you decide.


    1. Weight and Adjustability

    • Air Shocks: Air shocks are significantly lighter than coil shocks, often saving 300–500 grams. This weight reduction is a huge advantage for enduro racers who need to balance downhill capability with uphill efficiency. Air shocks also offer a wide range of adjustability, allowing you to fine-tune spring rate by simply adding or releasing air.
    • Coil Shocks: Heavier by design, coil shocks use a metal spring, which adds to the bike’s overall weight. While less adjustable, they provide a more linear spring curve, offering consistent support through the entire stroke.

    Verdict: If weight savings and easy tuning matter most — go air. If you’re okay with extra grams for rock-solid performance — go coil.


    2. Suspension Feel and Sensitivity

    • Air Shocks: Known for their progressive spring curve, air shocks ramp up resistance as they compress. This means they feel plush at the start of the stroke but stiffen up quickly to prevent bottoming out. This makes them ideal for varied terrain, offering support during hard hits without sacrificing pedaling efficiency.
    • Coil Shocks: Coil shocks deliver a smooth, linear feel, meaning the force needed to compress the shock increases steadily throughout the stroke. This results in better small-bump sensitivity and traction, making them perfect for steep, chunky descents where grip and control are vital.

    Verdict: Choose air for a more progressive feel and all-around versatility; opt for coil if you crave maximum traction and smooth suspension response.


    3. Maintenance and Durability

    • Air Shocks: Require more frequent maintenance due to seals, air canisters, and complex internals. Regular service is needed to prevent air leaks and maintain optimal performance.
    • Coil Shocks: Mechanically simpler, coil shocks are generally more durable and require less maintenance. However, the steel spring can wear over time, and swapping springs for different weights can be a hassle.

    Verdict: Air shocks need more TLC; coil shocks are tougher and simpler but less flexible.


    4. Which Shock is Right for You?

    • Choose Air Shocks If: You’re racing enduro, tackling long climbs, or want easy adjustability for mixed terrain. Perfect for riders who value weight savings and versatility.
    • Choose Coil Shocks If: You’re a gravity-focused rider hitting steep, technical descents, and prioritize grip, small-bump compliance, and consistent performance.

    Final Thoughts

    Ultimately, the choice between air and coil shocks boils down to your riding style. Many modern enduro bikes even allow for both options, letting you swap shocks depending on the terrain. If you’re unsure, consider testing both setups — what feels best under your feet often speaks louder than specs.

    So, which team are you on — air or coil? Drop your thoughts in the comments and share your go-to setup for enduro shredding!

  • Carbon vs. Alloy Frames in Enduro: Weighing Performance, Durability, and Cost

    Carbon vs. Alloy Frames in Enduro: Weighing Performance, Durability, and Cost

    When choosing the perfect enduro bike, one of the most critical decisions you’ll face is selecting a frame material: carbon or alloy (aluminum). Each option has its own strengths and weaknesses, and understanding these can help you make an informed choice that matches your riding style, budget, and long-term goals. Let’s break it down.

    1. Performance: Weight, Stiffness, and Ride Feel

    • Carbon Frames: Known for their lightweight nature, carbon frames can shave off up to a kilogram compared to their alloy counterparts. This weight reduction translates to better acceleration, easier climbing, and less fatigue over long rides. Carbon also allows manufacturers to fine-tune stiffness and compliance, offering a more responsive and vibration-dampened ride.
    • Alloy Frames: Although heavier, alloy frames offer solid performance, especially with modern designs. Advances in hydroforming and butting techniques have improved stiffness-to-weight ratios, making alloy frames more competitive than ever. They may feel a bit harsher on rough terrain compared to carbon, but many riders appreciate their direct and grounded feel.

    Verdict: If marginal weight savings and optimized stiffness are your top priorities, carbon is the winner. If you prioritize reliable, straightforward handling and don’t mind a bit of extra weight, alloy holds its ground.


    2. Durability and Impact Resistance

    • Carbon Frames: Despite being incredibly strong, carbon frames can be more vulnerable to catastrophic failure under sharp impacts, like a rock strike. Small cracks may not always be visible, making post-crash inspections crucial. However, high-end carbon bikes often incorporate advanced layups and protective layers to boost durability.
    • Alloy Frames: Alloy frames tend to dent rather than crack, making damage easier to spot and, in some cases, rideable until repairs can be made. They generally handle crashes and rough handling better without immediate risk of sudden failure.

    Verdict: For riders pushing the limits on gnarly descents or those prone to crashing, alloy offers peace of mind. Carbon frames require a bit more care but can still be extremely durable with proper handling.


    3. Cost and Value for Money

    • Carbon Frames: The cost of carbon frames is significantly higher due to complex manufacturing processes and premium materials. Enduro bikes with carbon frames often come with top-tier components, pushing prices even higher. However, they tend to retain value longer in the second-hand market.
    • Alloy Frames: Alloy frames offer excellent value for money. They provide high-level performance at a more affordable price, allowing budget-conscious riders to allocate extra funds toward better suspension, wheels, or drivetrain upgrades.

    Verdict: If you want the best bang for your buck, alloy is the clear winner. Carbon is ideal if you’re chasing top-end performance and have the budget to match.


    4. Which Frame is Right for You?

    • Choose Carbon If: You prioritize light weight, enhanced stiffness, and a smoother ride feel. You’re racing competitively or tackling long climbs where every gram counts.
    • Choose Alloy If: You’re budget-conscious, value durability, and prefer a no-nonsense frame that can handle rough treatment without constant worry.

    Final Thoughts

    Ultimately, the choice between carbon and alloy frames comes down to your riding style, budget, and preferences. Carbon shines in performance and weight savings, while alloy offers unbeatable value and ruggedness. Whichever frame you choose, modern enduro bikes have advanced so much that both materials are capable of conquering the toughest trails.

    What’s your pick — carbon or alloy? Let us know in the comments below and share your experience with your chosen frame material!

  • The Ultimate Guide to Choosing the Right Tires for Your Bike

    The Ultimate Guide to Choosing the Right Tires for Your Bike

    Selecting the right tires for your bike is crucial for ensuring a smooth ride, optimal performance, and safety. Whether you’re a casual cyclist, a mountain biker, or a road racer, understanding how to pick the perfect tires can make a world of difference. In this guide, we’ll walk you through the essential factors to consider when choosing bike tires.

    1. Understand Your Riding Style

    The first step in choosing the right bike tires is identifying your riding style. Different types of cycling require different tire features:

    • Road biking: Opt for slick or semi-slick tires with minimal tread to reduce rolling resistance and enhance speed.
    • Mountain biking: Look for wider tires with aggressive tread patterns for better grip on rough terrain.
    • Commuting: Consider puncture-resistant tires that balance durability with comfort.
    • Touring: Choose wider tires with extra tread for stability and durability on long-distance rides.

    2. Consider Tire Width

    Tire width directly affects your ride quality and performance:

    • Narrow tires (23-28mm): Best for road bikes, providing less rolling resistance and faster speeds.
    • Medium-width tires (30-40mm): Suitable for gravel or hybrid bikes, offering a balance of speed and comfort.
    • Wide tires (2.1″ and above): Ideal for mountain bikes, delivering more traction and shock absorption.

    3. Choose the Right Tread Pattern

    Tread patterns influence grip and control:

    • Slick tires: Smooth surfaces for paved roads and dry conditions.
    • Semi-slick tires: Light tread on the edges for versatility.
    • Knobby tires: Deep treads for off-road biking and loose terrain.

    4. Tube or Tubeless?

    Decide between traditional tube tires or modern tubeless options:

    • Tube tires: Easier to install and repair, suitable for most casual cyclists.
    • Tubeless tires: Offer lower pressure for improved grip, fewer flats, and better performance for mountain and gravel bikes.

    5. Check Tire Pressure (PSI)

    Proper tire pressure enhances safety and efficiency:

    • Road bikes: 80-130 PSI
    • Mountain bikes: 30-50 PSI
    • Hybrid bikes: 50-70 PSI Always follow the manufacturer’s recommendations printed on the tire sidewall.

    6. Material and Durability

    High-quality materials like Kevlar and reinforced rubber can increase tire lifespan and reduce punctures. Consider tires with extra layers of protection if you ride in urban areas with glass, nails, or other debris.

    Final Thoughts

    Choosing the right bike tires is a blend of understanding your riding needs, considering technical factors, and aligning with your budget. By keeping these points in mind, you can find tires that boost your cycling experience, whether you’re speeding down a road, climbing rocky trails, or cruising through city streets.

    Ready to roll? Invest in the right tires and ride with confidence!